The following contribution is from another author.
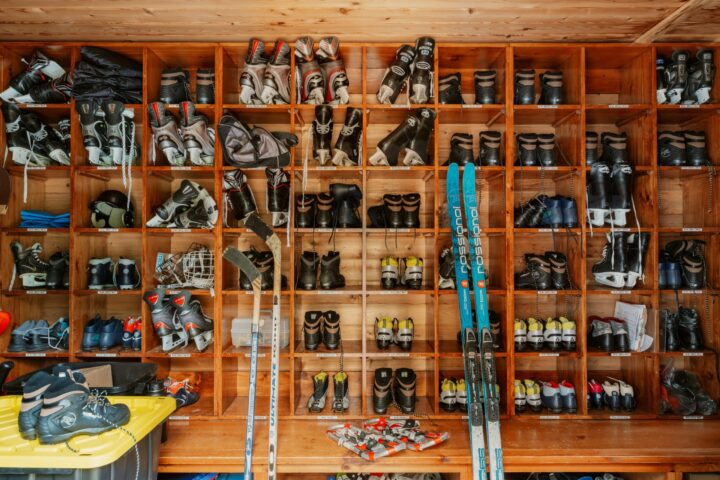
A well-designed gear room keeps outdoor equipment easy to find, dry and ready for the next trip. It also prevents backpacks, helmets and muddy footwear from spreading through the house. The best setup depends on your activities, available space and travel habits, so start with what you own before buying cabinets or knocking down walls.
A dedicated room is ideal, but it’s not the only option. An entryway, garage corner and finished basement can work together as one practical storage system.
Assess Your Active Lifestyle Influx
List every activity your household enjoys, then group the related equipment by size and frequency of use. Daily cycling gear belongs close to an exit, while seasonal camping supplies can sit on higher shelves. Detailed outdoor gear storage ideas can help you spot useful options for awkward items, including wall tracks and open bins.
Measure bulky pieces before planning shelves. A cabinet that looks generous on paper may not fit a large backpack or storage tote. You should also leave about 20 percent of each shelf open for future purchases and a changing lifestyle.
Watch how equipment enters your home after a trip. Wet boots, dusty bags and damp outerwear need a landing area where they can dry without damaging finished floors.
Zone Planning from Entryway to Basement
Divide storage according to the steps you take before and after an outing. Near the main entrance, install hooks, a bench and washable trays for items you use several times a week. Keep cleaning supplies and a drying rack nearby so dirt doesn’t travel farther into the house.
Reserve the basement or a spare room for long-term storage, repairs and packing. If this plan requires moving walls, finishing an unfinished level or improving access between floors, homeowners in Lansdale, Montgomery County and Bucks County can consult whole home remodeling specialists about a coordinated design/build renovation.
Create one clearly labeled zone per person or activity. This makes unpacking easier because every item has an obvious destination.
Reconfiguring Layouts for Maximum Utility
Use vertical space before giving up floor area. Adjustable wall tracks let you reposition shelves and hooks when equipment changes, while ceiling-mounted racks can hold light seasonal items. Keep heavy bins between knee and shoulder height so you can lift them safely.
A central packing surface adds real value. A 30-inch-deep counter gives you room to check supplies, charge devices and organize clothing without covering the floor. Place drawers below it for small accessories that tend to disappear inside large tubs.
Good adventure gear organization also depends on visibility. Use clear containers for small items and large printed labels for opaque bins. Open shelving suits frequently used gear, while closed cabinets keep visual clutter under control.
Durable Materials That Endure Heavy Travel
Choose finishes that can handle moisture, grit and repeated impacts. Porcelain tile, sealed concrete and quality luxury vinyl plank are easier to clean than carpet. If the room sits below grade, address leaks and humidity before installing cabinetry or storing fabric equipment.
Cabinets made from exterior-grade plywood generally tolerate hard use better than low-density fiberboard. Use corrosion-resistant hardware in damp areas and add rubber mats beneath wet footwear. Walls also need protection, especially behind hanging equipment. Washable paint or durable wall panels simplify cleanup.
Finish the room with bright overhead lighting and task lighting above the packing counter. Add outlets where rechargeable equipment will sit, but keep cords away from sinks and drying zones. Once every shelf has a purpose, packing becomes faster and returning home no longer creates a hallway pile.